[JAVA] 생활코딩 JAVA1 - Chapter 10. 입력과 출력 : 입력과 출력

Chapter 10. 입력과 출력 : 입력과 출력
| INPUT | Program | OUTPUT |
| Argument File Network Audio Program |
Monitor File Audio Program |
입력 값 사용 시 장점 : 변수 값을 일일이 바꿔주지 않아도 됨
#ShowInputDialog
사용자가 입력한 값에 따라 다른 동작을 하게 되는 프로그램 만들기
import javax.swing.JOptionPane;

import org.opentutorials.iot.DimmingLights;
import org.opentutorials.iot.Elevator;
import org.opentutorials.iot.Lighting;
import org.opentutorials.iot.Security;

public class OkJavaGoInHomeinput_1 {

	public static void main(String[] args) {

		String id = JOptionPane.showInputDialog("Enter a ID");

		// Elevator call
		 Elevator myElevator = new Elevator(id);
		 myElevator.callForUp(1);

		// Security off
		 Security mySecurity = new Security(id);
		 mySecurity.off();

		// Light on
		Lighting hallLamp = new Lighting(id+" / Hall Lamp");
		hallLamp.on();

		Lighting floorLamp = new Lighting(id+" / floor Lamp");
		floorLamp.on();

	}

}
01. google 검색 활용 - 'java popup input text wsing' 검색

02. 검색하여 나온 값 카피하여 적용 - JOptionpane 빨간 줄 뜨는 거에 커서 올려서 맨 윗줄 클릭

03. 맨 위에 해당 줄이 추가 됨
'javax(자바 엑스)에 속해있는 swing(스윙)이라는 JOptionPane(제이옵션페인)이라는 class(클래스)가 load(로드) 되었다'라는 뜻

04. "Enter a ID"로 수정 후 실행 - ID 입력하라는 popup 창 뜸

05. ID값 입력 - OK - 입력 한 값에 따른 결과 나옴


#입력 값이 여러 개인 프로그램 만들기
import javax.swing.JOptionPane;

import org.opentutorials.iot.DimmingLights;
import org.opentutorials.iot.Elevator;
import org.opentutorials.iot.Lighting;
import org.opentutorials.iot.Security;

public class OkJavaGoInHomeinput1 {

	public static void main(String[] args) {

		String id = JOptionPane.showInputDialog("Enter a ID");
		String bright = JOptionPane.showInputDialog("Enter a Bright level");

		// Elevator call
		 Elevator myElevator = new Elevator(id);
		 myElevator.callForUp(1);

		// Security off
		 Security mySecurity = new Security(id);
		 mySecurity.off();

		// Light on
		Lighting hallLamp = new Lighting(id+" / Hall Lamp");
		hallLamp.on();

		Lighting floorLamp = new Lighting(id+" / floor Lamp");
		floorLamp.on();

		DimmingLights moodLamp = new DimmingLights(id+" mood Lamp");
		moodLamp.setBright(Double.parseDouble(bright));
		moodLamp.on();

	}

}
01. 단계별 밝기 조절이 가능한 램프 생성
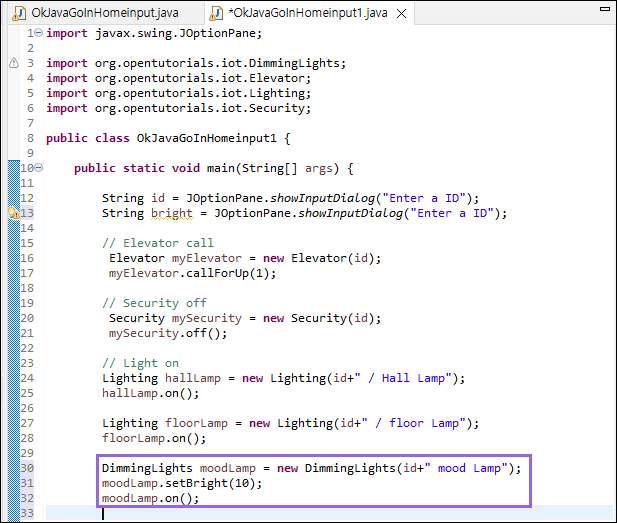
밝기가 10으로 조절되는 램프를 생성함
02. 밝기 입력값을 받기 위해 'bright'라는 코드 생성 - '10'을 넣었던 자리에 'bright'값 넣기
SetBright : 31번째 줄에 들어갈 SetBright bright는 Doble형인데 13번째 줄에 bright값은 String임

03. String을 Doble로 컨버팅 하기 - google 검색 활용
'java string to double conversion' 검색

Double.parseDouble(text);(text)로 들어온 입력 값이 Double 형태로 바뀜
*parse : 분석하다
04. 카피해온 값 붙여넣기 - text 값에 bright 입력 - 13번째 줄 입력값 이름도 변경해주기
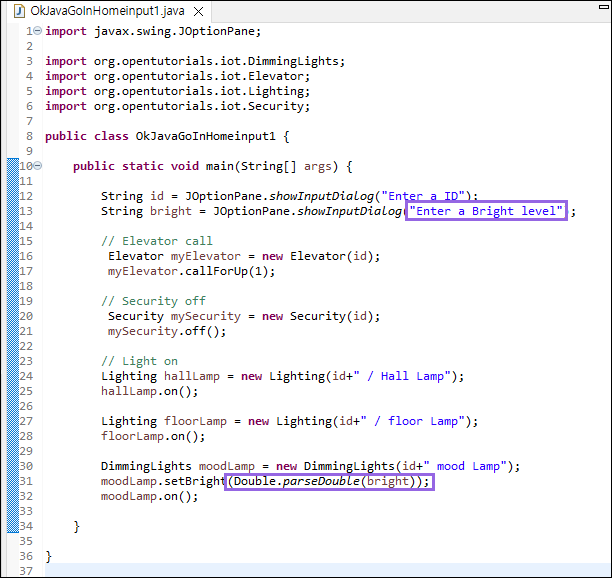
05. 실행하면 ID 입력 창 다음 밝기 레벨 입력 창 나옴


